Generate DRS manifest
To generate DRS manifest file:
- Navigate to your project.
- Click the Files tab.
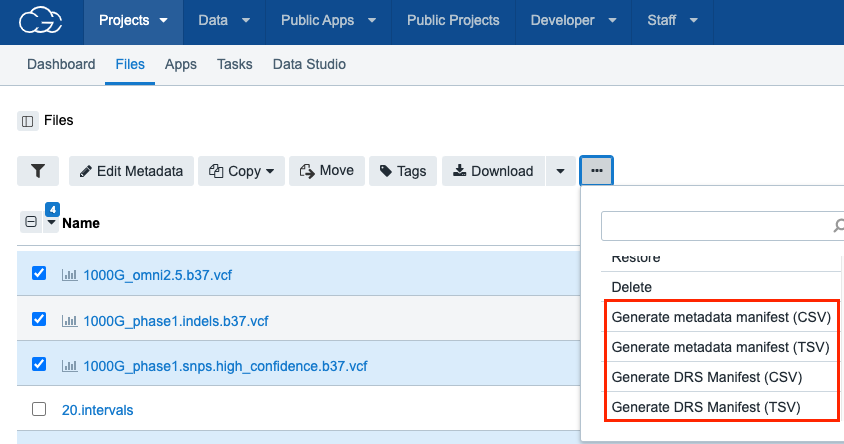
- Select one or more files.
- Click the ellipsis menu next to the "Download" option and choose to generate the DRS manifest file in either CSV or TSV format.

- The DRS manifest file will be generated in your project. You can monitor the progress in the upper right corner.

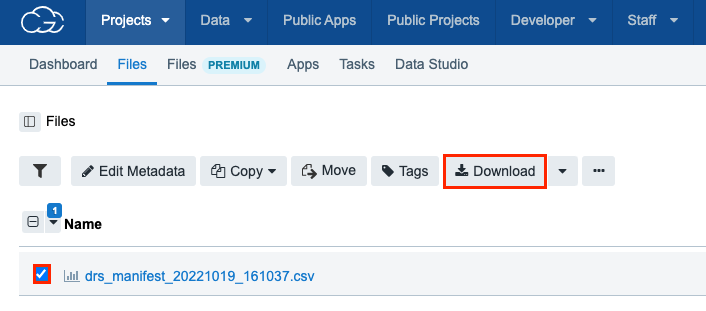
- Locate the manifest file in your project. The file name is generated by appending the time and date to "drs_manifest", e.g. "drs_manifest__YYYYMMDD_HHMMSS". If the manifest is generated successfully, you can also click on the link shown in the "Activity" area (see the screenshot above - "DRS manifest").

- (Optional) Download the manifest
After downloading the manifest, you can go to another Seven Bridges Platform to import those files using our Import DRS from a manifest feature.
Important notes:
- The exported manifest file can be used as any other file in the project, i.e. copied to another project, used in a task, etc.
- You can reuse the exported manifest without changing its structure (columns). You can edit metadata schema and custom metadata fields (other fields are treated as read-only - this pertains to id, name, size and project fields) and submit the edited manifest file.
- The maximum file size for the manifest is 5 GiB.
- The exported manifest file contains metadata for files only.
- The following columns are available in the manifest:
- DRS URI
- name (along with path within the project)
- metadata schema fields
- custom metadata fields
Updated about 3 years ago
