Quickstart - TCGA data (controlled access required)
To introduce you to the major features of the CGC, this QuickStart will walk through a simple somatic calling analysis using Vardict Somatic Calling.
Prerequisites
In order to be able to use all resources which are discussed in this QuickStart you need to have access to TCGA Controlled Data through dbGaP.
If you don’t have access to TCGA Controlled Data, you can still analyze the Open Data from TCGA dataset using the available apps without special permission from dbGaP.
Procedure
We'll start by creating a project and populating it with TCGA files. Then we'll use one of the CGC somatic calling workflows, "Vardict Somatic Calling", to carry out the analysis. Finally, we'll examine the results.
On this page:
Create a project
The first step to running an analysis on the CGC is to create a project.
- Choose Create a project under Projects in the top navigation bar and the window for naming your project is shown.
- Enter "Quickstart" as the project name.
- Choose the billing group.
- Select This project will contain TCGA Controlled Data since we will use TCGA Controlled Data.
- Click Create.
Add analysis data
In this Quickstart, we will use the TCGA data to analyze a Cervical Squamous Cell Carcinoma patient with TTN missense mutation. To add analysis data:
- Choose Data Overview from the Data menu.
The Data Overview page is displayed. The TCGA GRCh38 dataset is selected by default.
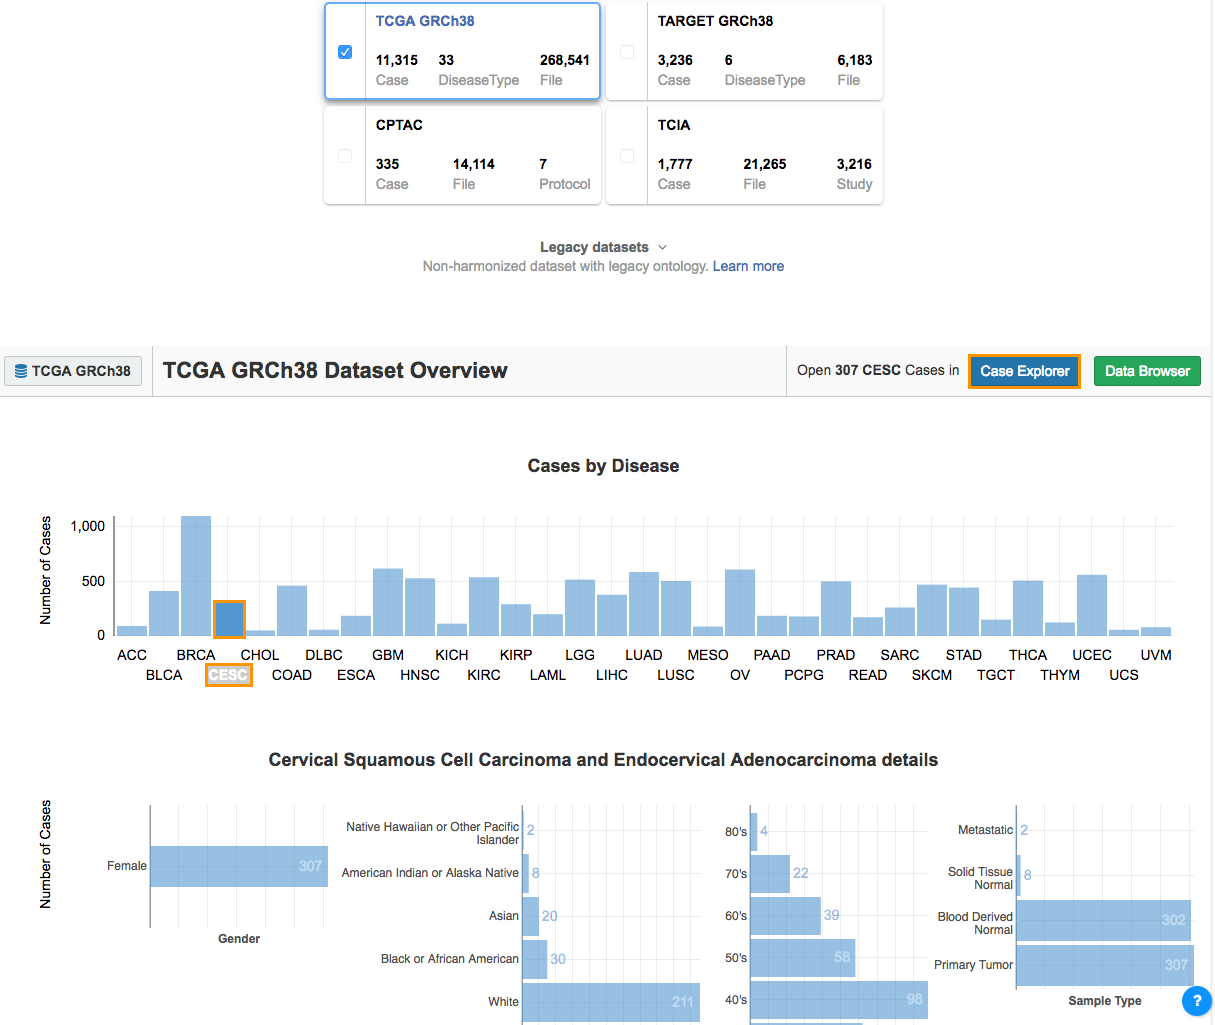
- Select CESC from the Cases by Disease section. The Disease Details section will show:
- The total number of cases.
- The sex distribution.
- Race.
- Age at diagnosis.
- The sample type.
- The next step is to filter these cases using the Case Explorer.
- Click Case Explorer in the upper right corner (see above) to open the Case Explorer.
The Case Explorer allows researchers to easily find a subset of TCGA data based on a disease and gene mutation.
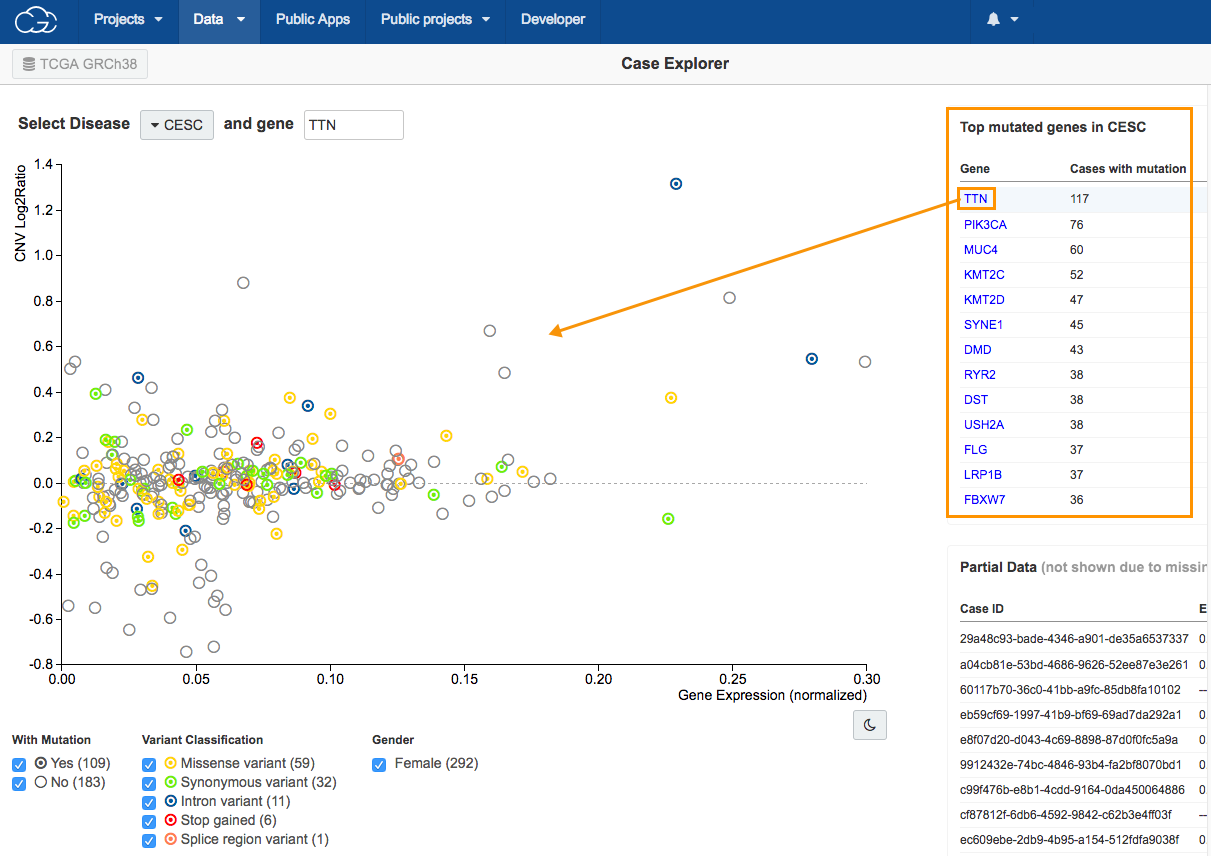
4.Click TTN in the Top mutated genes in CESC table in the upper right corner, as shown above. All available cases will be displayed on the scatter plot.
Circle colors on the scatter plot
The scatter plot is populated to show the relation between copy number variation (CNV) on the y-axis and gene expression levels on the x-axis for the selected gene in patients with CESC. The colors of the circles represent different types of mutation (see the Variant Classification filter below the scatter plot).
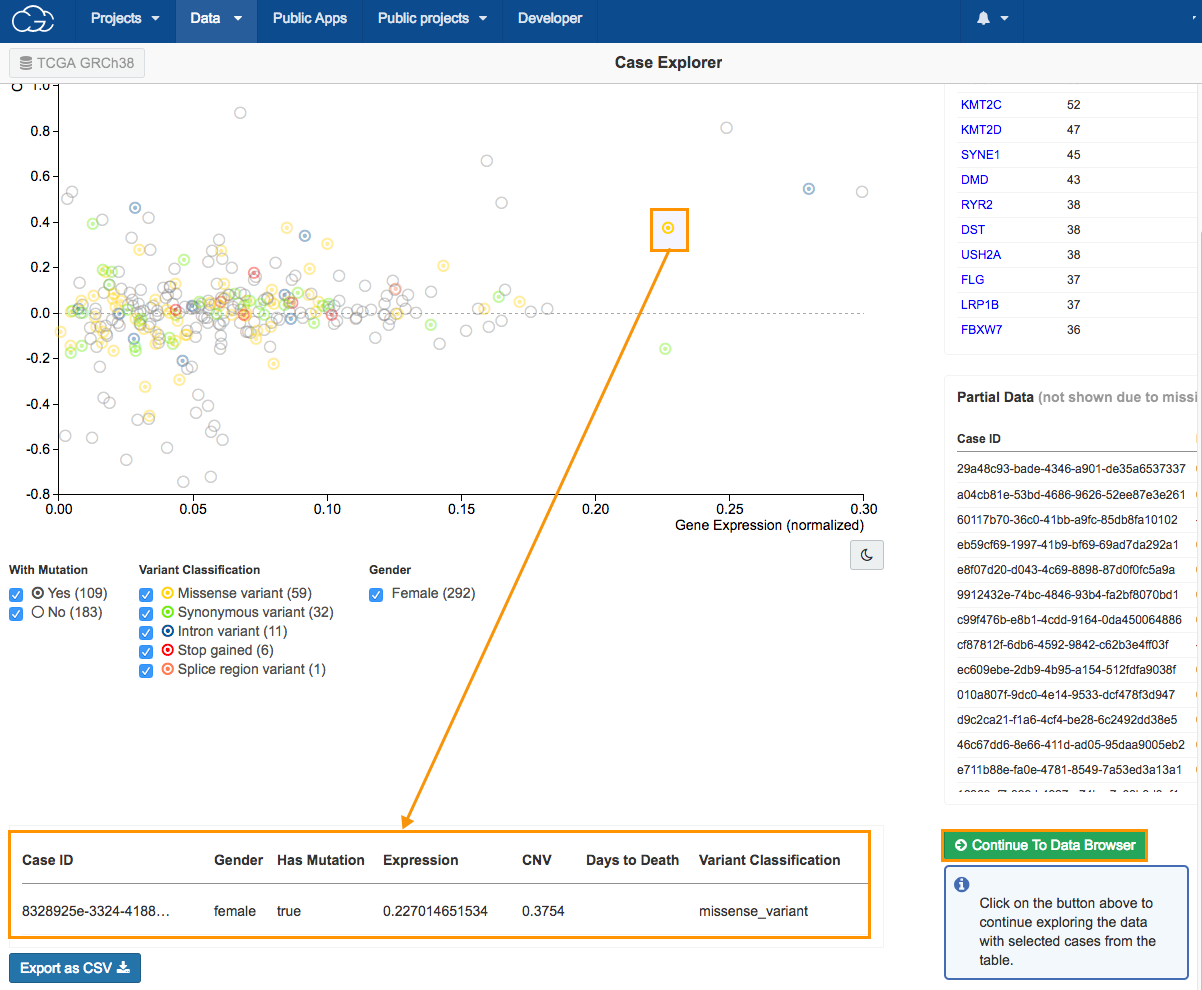
- Select a case, as shown above. The case information will be displayed in the bottom of the page.
- Click Continue to Data Browser to copy the file for the case we selected. This will take us to the Data Browser where we can find the WXS aligned BAM files from this case.
Selecting multiple Cases
Copy multiple files at once by selecting them all before clicking the Continue to Data Browser button.
Find files associated with the case
Using the Data Browser, we'll build a query to filter data from this case by combining metadata attributes. In the example below, we will choose WXS (Whole Exome Sequencing) as experimental strategy and BAM as data format.
Upon opening it, the Data Browser will display the case we picked using the Case Explorer.
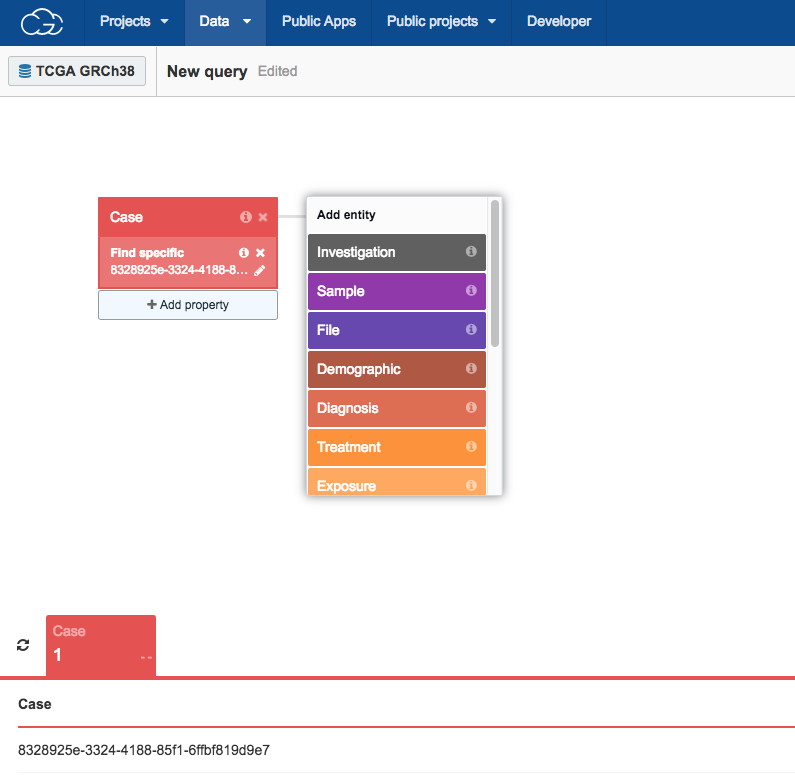
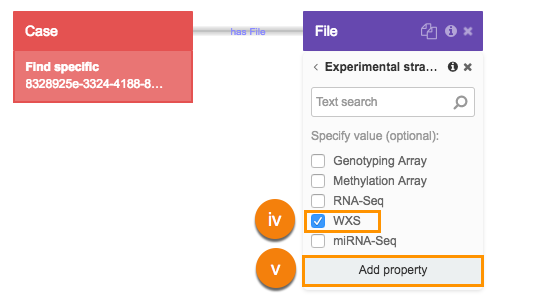
To find the matched tumor/normal aligned BAM files associated with this case:
- Choose the WXS as experimental strategy:
i Click File.
ii Search for "Experimental strategy" and select it.
iii Select Experimental strategy.
iv Next, choose the WXS (Whole Exome Sequencing) metadata filter.
v Click Add property.
- Repeat this procedure to add BAM format as a property.
i. Click Data format.
ii. Choose BAM filter.
iii. Click Add property.
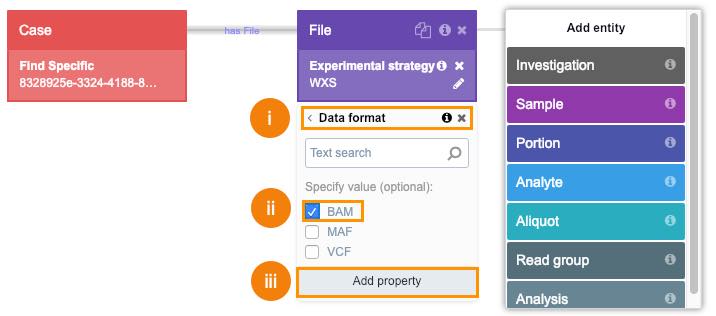
This will give you all files created as a result of the WXS experiment.
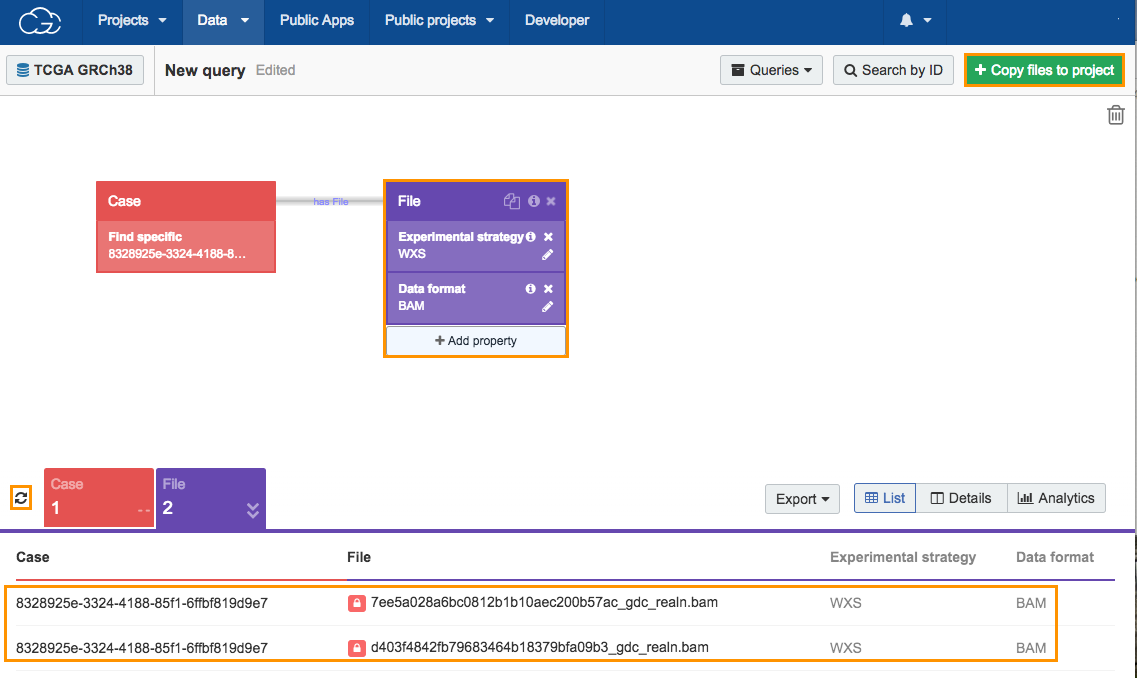
Click the refresh icon next to the count cards below the Data Browser to display the number of cases and results returned by the query, which is one case and two files. The next step is adding TCGA files to your project.
Add TCGA files to your project
To add TCGA files to your project after finding them using the Data Browser:

- Click Copy files to project in the upper right corner.
- Choose your Quickstart project.
The confirmation window is displayed.
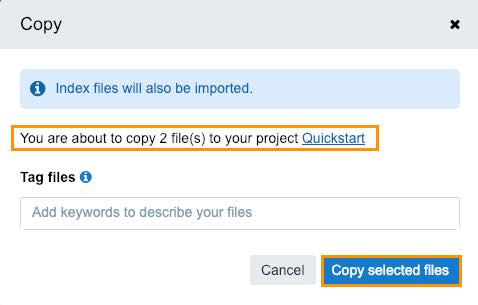
- Click Copy selected files.
This concludes the procedure of adding TCGA files to your project. The next step is adding a FASTA index file to your project.
Add the FASTA index file to your project
For your task to execute properly, you will need to add a FASTA index file to your project:
- Open your "Quickstart" project.
- Click the Files tab.
- Click Add files > Public Files.
- Use the search field to look for Homo_sapiens_assembly38.fasta.fai.
- Select the file.
- Click Copy to Project.

- Click Copy to confirm.
This concludes the procedure of adding a FASTA index to your project. The next step is adding a BED file to your project.
Add the BED file to your project
The procedure for adding a BED file is the same as adding a FASTA file. Please follow the procedure above again and copy the "Homo_sapiens_primary_assembly38_80_intervals.bed" file to your project.
The next step after that is choosing the workflow for your analysis.
Choose the workflow
With the analysis data now prepared, we need to choose the workflow for performing the analysis. We'll use public workflow Vardict Somatic Calling, a somatic caller that employs a heuristic approach to call variants that meet desired thresholds for read depth, base quality, variant allele frequency, and statistical significance.
To select the workflow:
- Click Public Apps in the top bar navigation.
- Search for "Vardict Somatic Calling".
- Click Copy below the workflow.
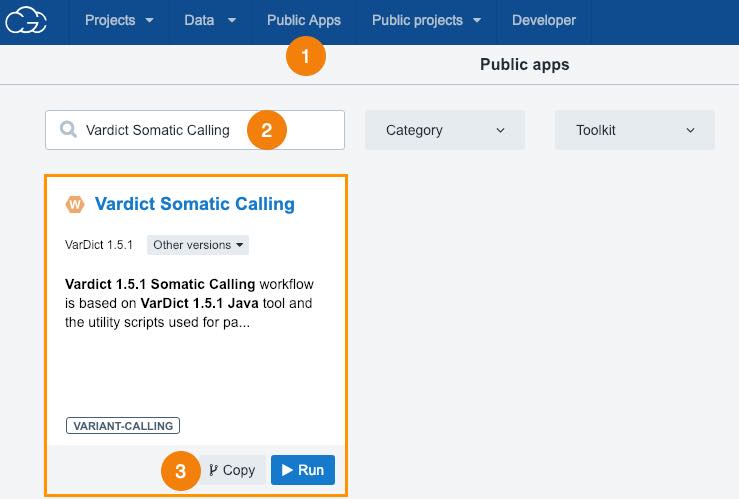
The screen is refreshed.
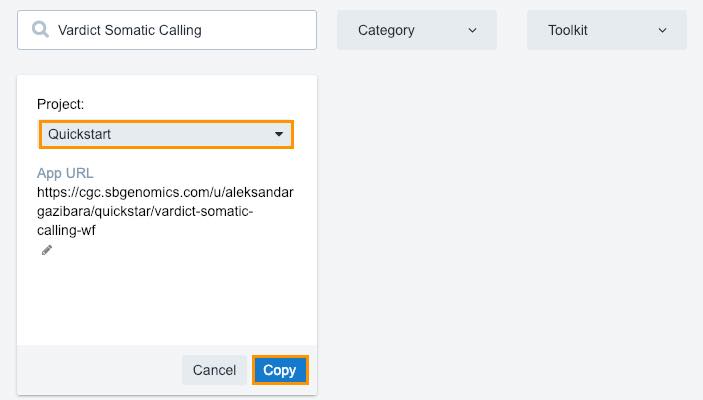
- Choose your "Quickstart" project.
- Click Copy.
This will copy the workflow to your project apps. The next step is running the analysis.
Run the analysis
Now that the analysis data and the workflow are ready, it's time to run the analysis.

To run the analysis:
- Click the Apps tab in your Quickstart project.
- Click Run next to the Vardict Somatic Calling workflow.
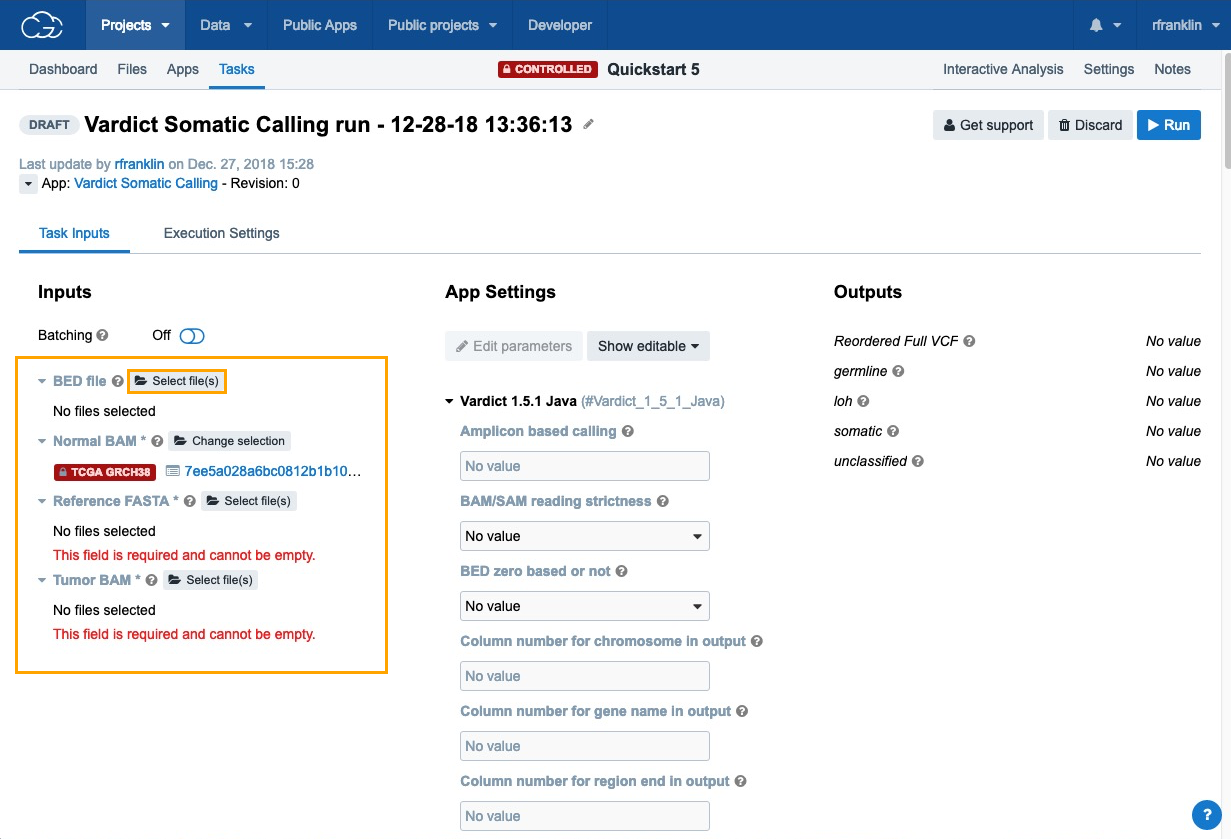
- Next, click Select file(s) next to each of the inputs choose the files:
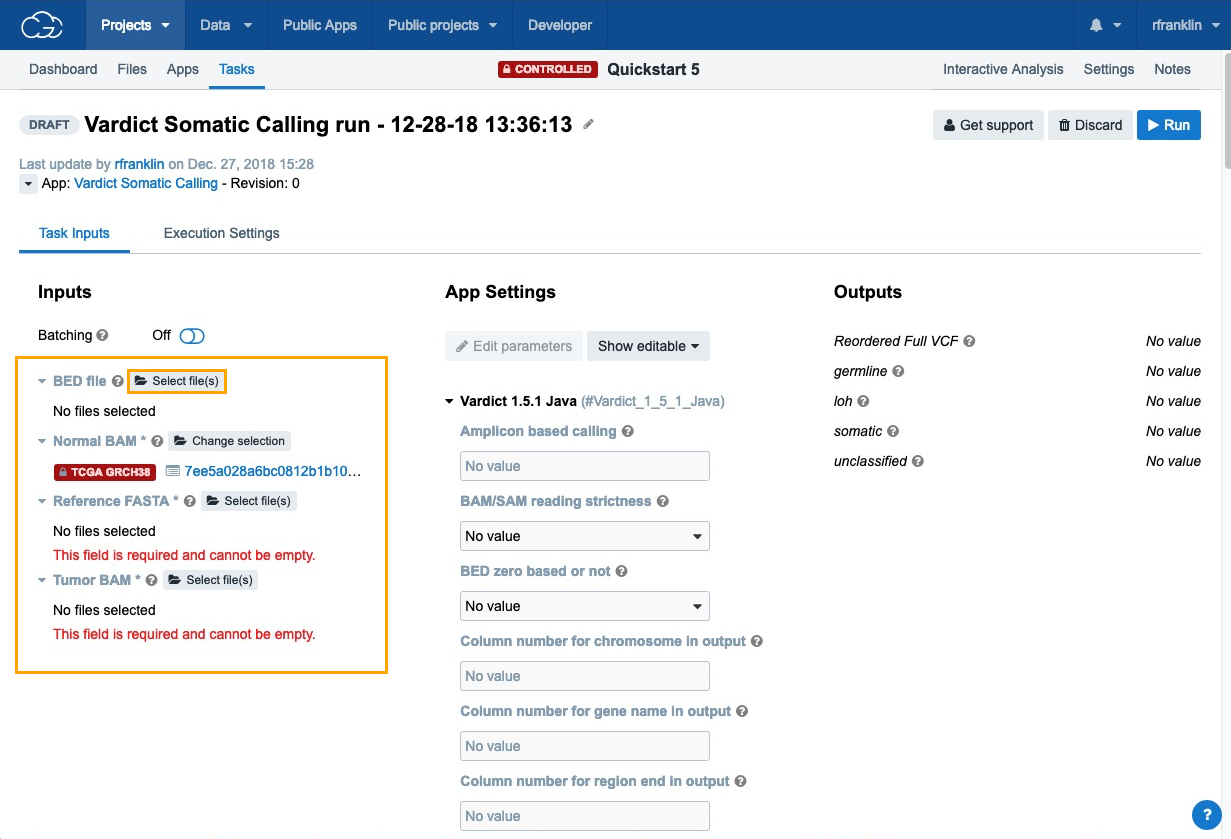
- BED File - choose "Homo_sapiens_primary_assembly38_80_intervals.bed".
- Normal BAM - choose "7ee5a028a6bc0812b1b10aec200b57ac_gdc_realn.bam", which contains the analysis data that we have previously added to the project using the Data Browser and Case Explorer.
- Reference FASTA - choose "Homo_sapiens_assembly38.fasta".
- Tumor BAM - choose "d403f4842fb79683464b18379bfa09b3_gdc_realn.bam".
Now that all the required input files for the workflow are set, click Run to start the analysis.
When you start the task, a new page opens displaying the task's properties.
The status will be a progress bar (if the task is still running) or a label detailing whether the task has completed, been aborted or failed.
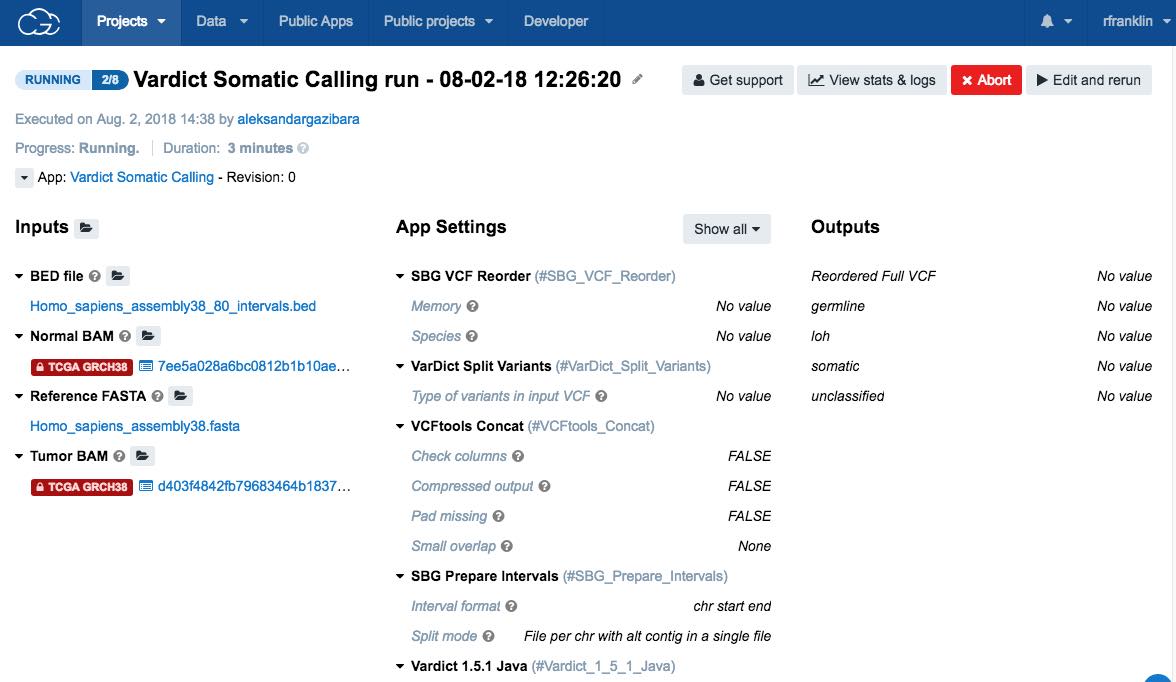
For additional information, including how to check the status of the task or how to troubleshoot in case of the failed task, check the task statistics. Also, you will receive an email notification once the task is completed.
View the results
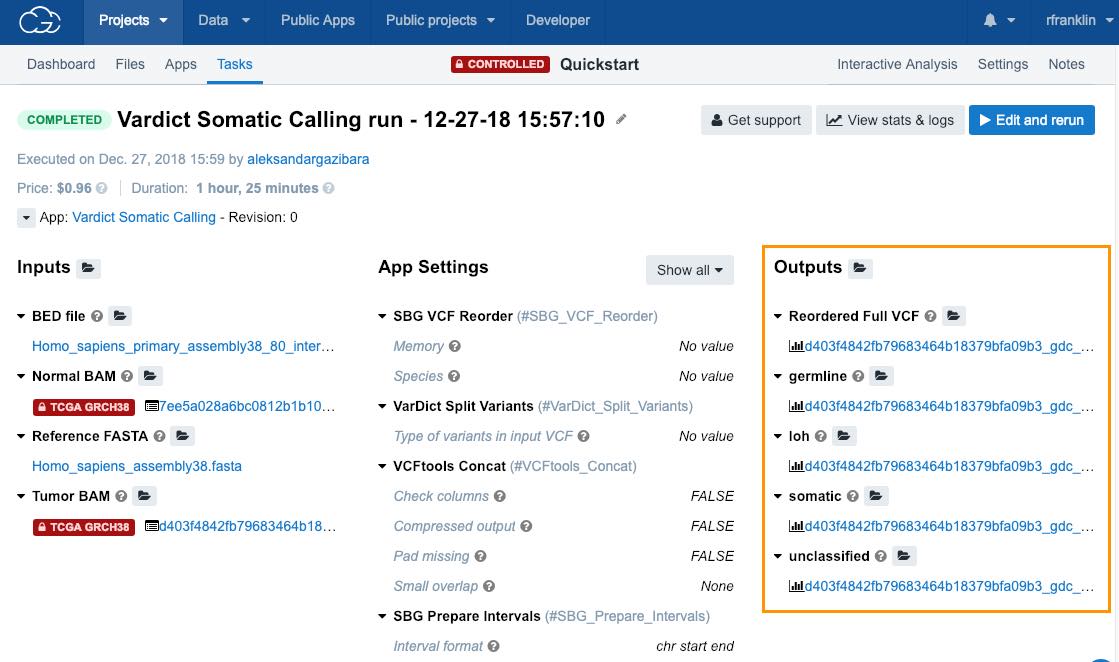
To see the results of your task
- Open the task page.
- Click on any of the files in the Outputs column.
Updated 4 months ago
